How to set up a Weather Dashboard Application using AWS and OpenWeather API


Hi Peepz,
I joined a challenge this new year; #DevOpsAllStarsChallenge
Brief Overview
This project is the Day 1 project of the challenge. #DevOpsAllStarsChallenge is a challenge that aims to equip devops engineers with on demand skills required of them.
Project Description

Whether you’re planning a picnic or deciding what to wear, a weather dashboard can provide essential insights. In this post, I’ll walk you through the development of a Python-based weather dashboard that integrates the OpenWeather API for data retrieval and AWS S3 for storage.
The Weather Dashboard is a Python application that fetches weather data for specified cities using the OpenWeather API and stores the data in an AWS S3 bucket. It supports dynamic city input (manually listing the cities you want to check their weather condidtions), ensures proper environment variable handling, and logs errors for easy debugging.
Project Structure
weather-dashboard/
  src/
    __init__.py
    weather_dashboard.py
  tests/
  data/
  .env
  .gitignore
  requirements.txt
  README.md
Features
Dynamic City Input: Users can input cities dynamically instead of relying on hardcoded lists.
Weather Data Retrieval: Real-time data is fetched from the OpenWeather API, including temperature, humidity, and weather conditions.
AWS Integration: Weather data is stored in an S3 bucket for centralized access and future analysis.
Error Logging: All errors are logged into a file, ensuring easier debugging and monitoring.
Environment Variables: Sensitive information like API keys and bucket names are securely managed using a
.envfile.Region-Specific Bucket Handling: The app supports S3 bucket creation in different AWS regions.
Tech Stack
Programming Language: Python
Libraries Used:
boto3,requests,python-dotenvCloud Service: AWS S3 for data storage
API: OpenWeather API for fetching weather details
Prerequisites
Before running this project, ensure you have the following:
1. Python
Version 3.7 or higher is required.
Confirm you have python and pip installed already by running this command:
python3 --version
pip --version
If you don’t, follow the installation guide on python official page
2. AWS Credentials
You’ll need your Access Key, Secret Key, default region, and output format.
If you don’t already have an AWS account you can create a free tier account using this link.
After your registration, logon and create a unique user
Create an access key for this user
Initialize your AWS Cli using this command:
aws configure
3. OPENWEATHER API KEY
Sign up at OpenWeather.
Signup to Openweather platform
Navigate to your account icon dropdown to generate an API key from your OpenWeather dashboard.

Generate your API Key
Walkthrough
To run this project on your local machine; clone the repository from here: Github Repo
1. Configure environment variables (.env):
echo "OPENWEATHER_API_KEY=your_api_key" >> .env
echo "AWS_BUCKET_NAME=your_bucket_name" >> .env
echo "AWS_REGION=your_preferred_region" >> .env
2. In your requirements.txt file, put this:
echo "boto3==1.26.137" >> requirements.txt
echo "python-dotenv==1.0.0" >> requirements.txt
echo "requests==2.28.2" >> requirements.txt
3. Setup a Virtual Environment
python3 -m venv weather_venv
source weather_venv/bin/activate  # On macOS/Linux
weather_venv\Scripts\activate  # On Windows
4. Install your dependencies in the requirements.txt file
pip install -r requirements.txt
5. Some extracts from the weather_dashboard.py file
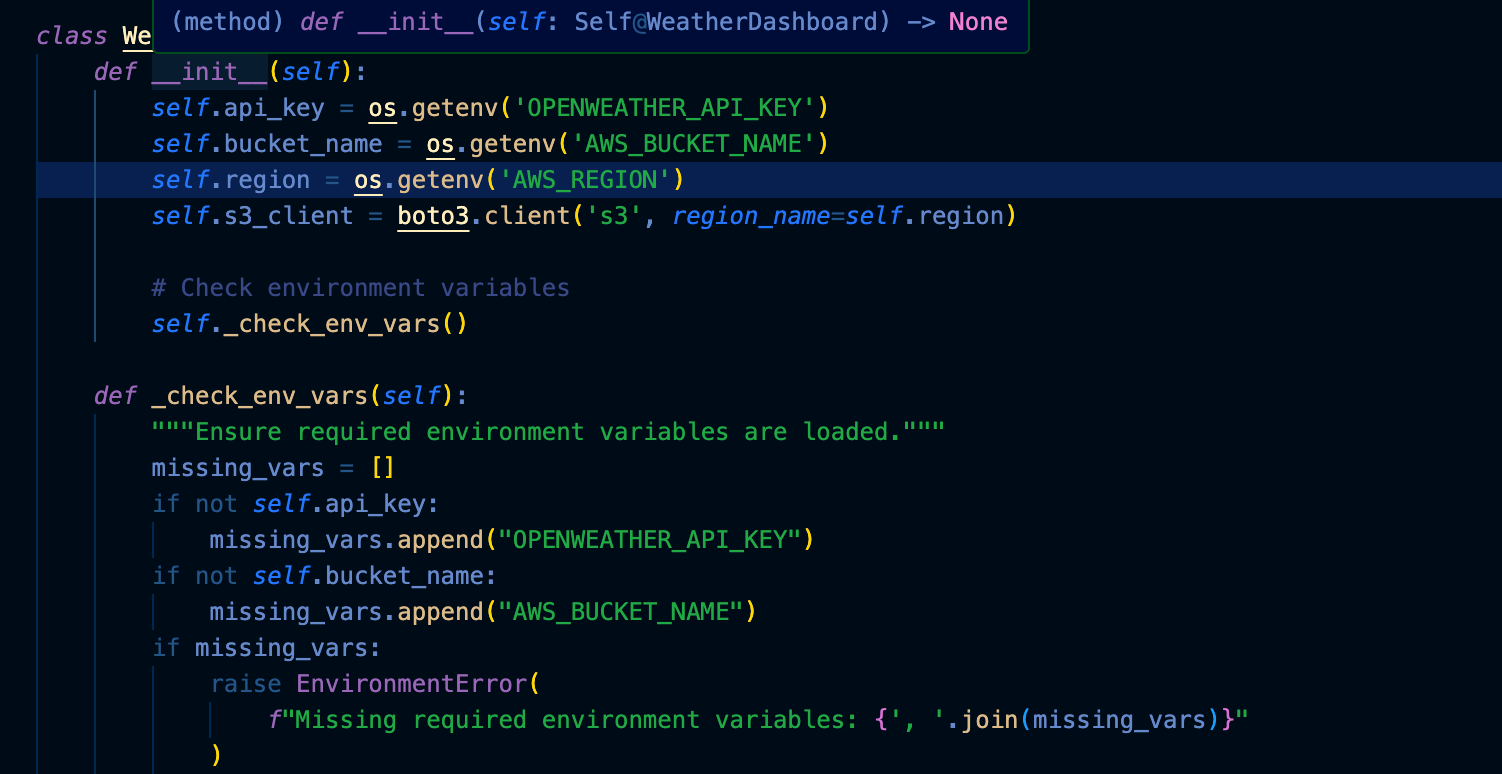
Ensure that the variables are loaded properly from the .env file
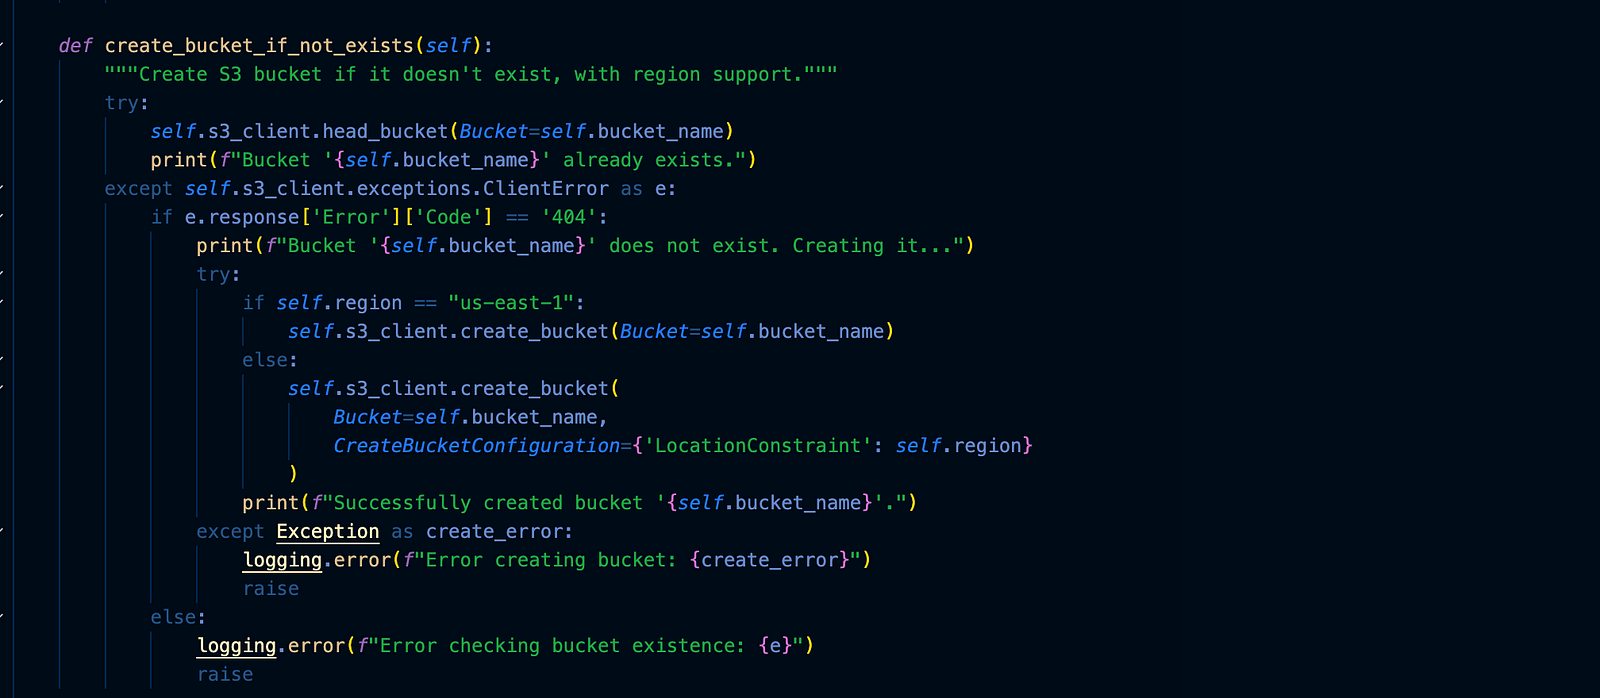
This snippet creates the S3 bucket with in the region you specified.
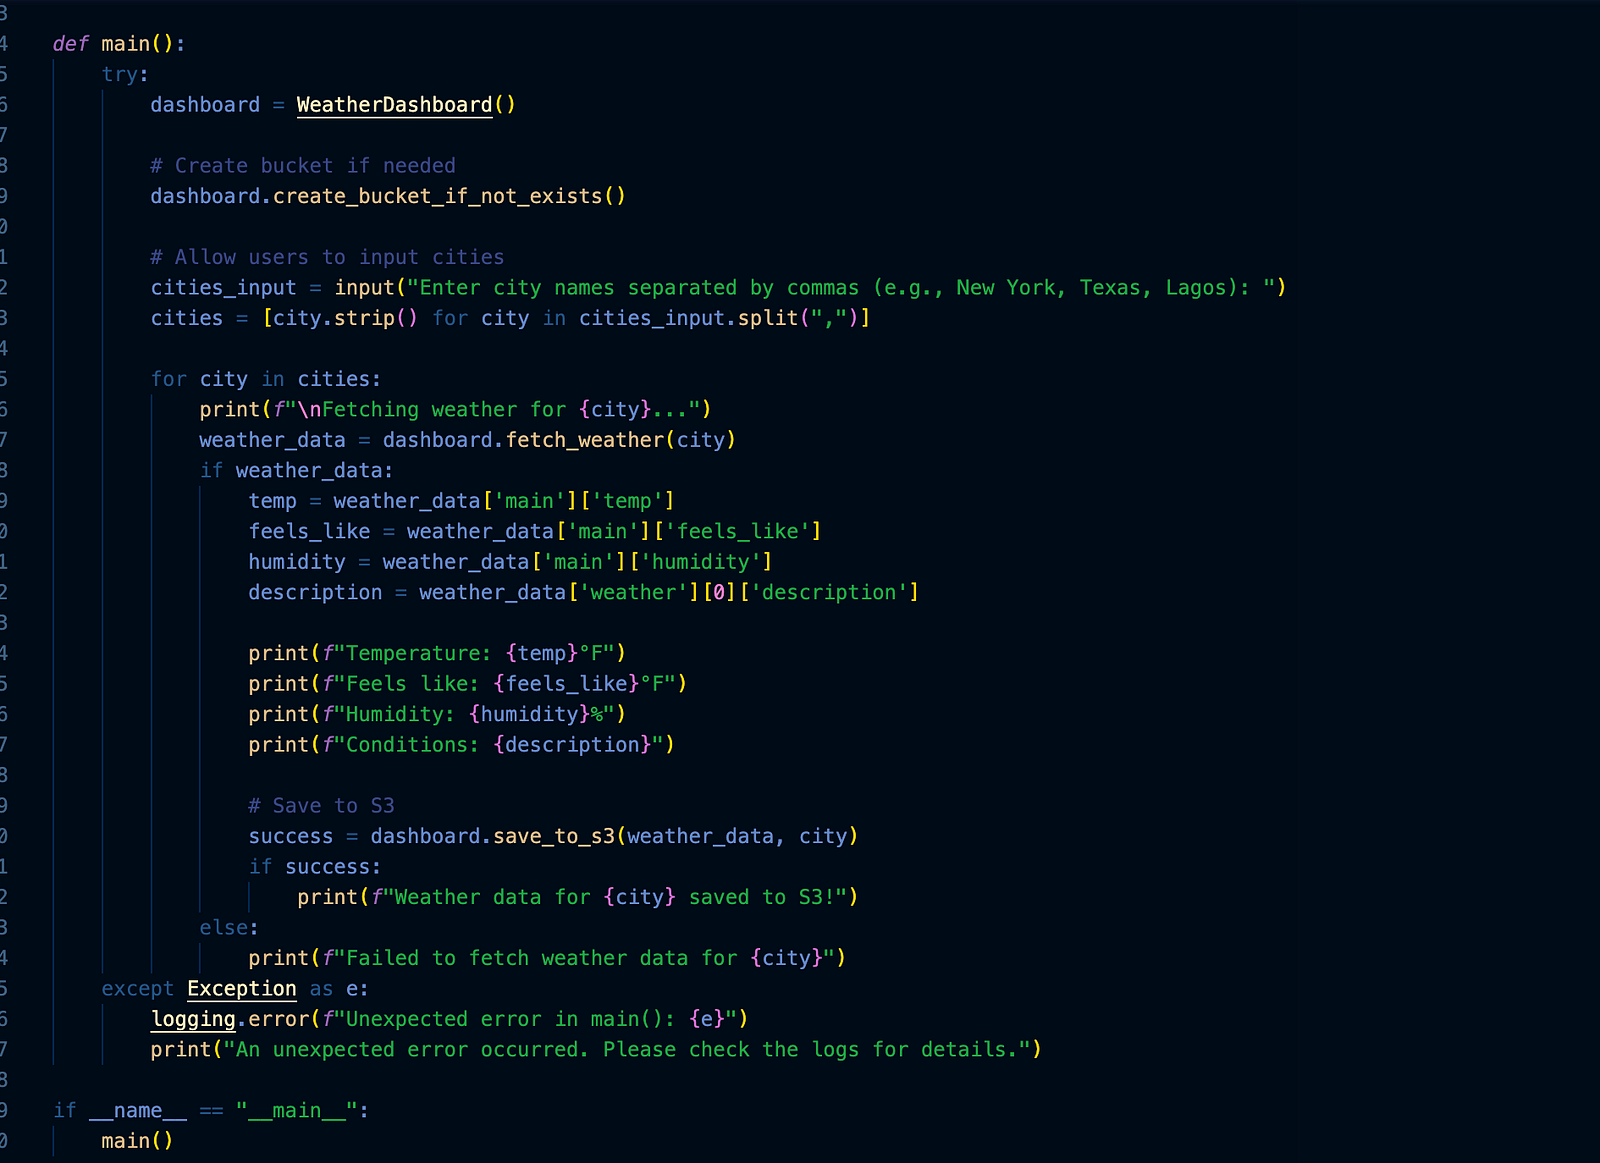
This fetches weather data from the Openweather API based on the user city input and stores it in the specified S3 bucket.
Run the weather application
You can run the application using the command below:
python3 src/weather_dashboard.py
Sample of Expected Result
Fetching weather for Abuja…
Temperature: 93.74°F
Feels like: 89.13°F
Humidity: 11%
Conditions: broken clouds
Successfully saved data for Abuja to S3.
Weather data for Abuja saved to S3!
Checkout my post on medium